(Cont. from above)
After the rough carving, I switch to a stump bur (ordered from same catalog as the Kutzall) for shaping the figures.  This bur is easily controlled and gives a fairly smooth finish.  Because of this finish, I rarely sand anything.
Now I am ready to do the detail carving.  For this step I use the Turbo carver with a ball-tipped bur.  I use the larger bur for clearing out areas that I couldn’t get with the stump bur.  The small ball bur is used for extremely small detail such as fur, feathers, eyes, etc.  I sometimes use a wood-burning tool instead of the turbo or in combination with the turbo.  It all depends on the look I want and whether I am going to paint or stain the gourd.
At this point, I am ready for the finish.  If I am going to paint the gourd, I spray the interior with flat black paint from the hardware store. I am not careful about getting black paint on the outside of the gourd. It seems to cover quite well with acrylic paint.  If I plan on wood burning, I will paint the inside by hand.
I use Delta Ceramcoat acrylic paint. It seems to cover better than the cheaper brands. I purchase these at Michael’s.  I begin by painting the background first.  The last thing I paint is the main subject of the gourd. After all the painting is finished, I spray it with an acrylic satin finish.
If the piece is wood burned with no paint, I prefer to spray with satin finish lacquer to protect it. Also, I found that it does not darken the finish of the gourd.
I am now ready to cut open the top of the gourd. To do this, I use a mini-jigsaw.  If there is detail around the opening that might be damaged while cleaning, I don't cut that part out at this time.  After the opening is done, I use various scrapers and sandpaper to clean and smooth the inside. I paint the inside later in the process.
With the inside prepared, I use a jigsaw to cut out any large areas that I want removed. Details in the drawing can be difficult to cut around without breaking them off.  Even if they do break off, I simply modify the design if possible to accommodate this change.  It took me several gourds before I became comfortable judging how much of the gourd to cut away.  I had to be sure that the openings were not too large and that gourd pieces were connected for added strength and integrity.
Once all the openings in the gourd are cut, I begin the rough carving with the Foredom tool using a Kutzall fine bur.  It does not gouge the gourd but instead cuts smoothly and quickly.  It took very little practice to feel comfortable with this bur. I purchased it from MDI Woodcarvers Supply at www.mdiwoodcarvers.com.  If the design is fairly complicated with several different layers, I take a pencil and mark what I want to carve away.  On occasion I have carved through the gourd in an area where I shouldn’t have done so.  I just patch the hole with some wood putty.  This works fine since paint covers these areas well and I paint most of my gourds.  If I plan on wood burning the gourd rather than painting it, I mix some of the gourd dust with glue and fill the hole. It makes the repair almost invisible. (Cont. below photos)
Caption information

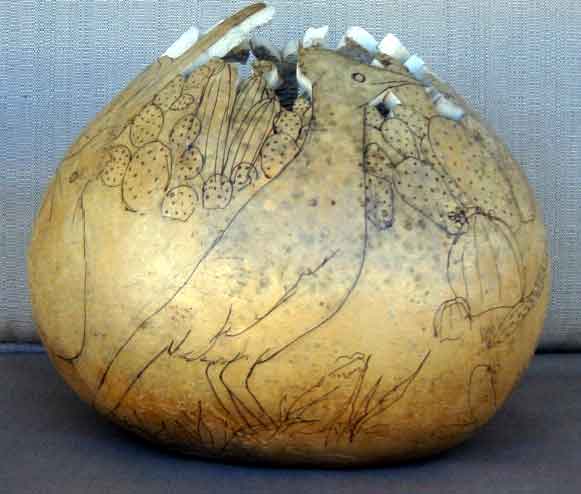
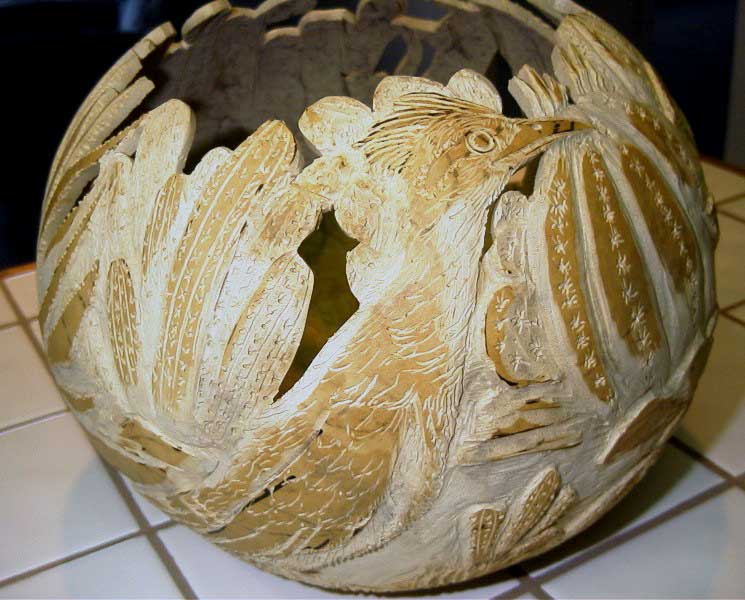
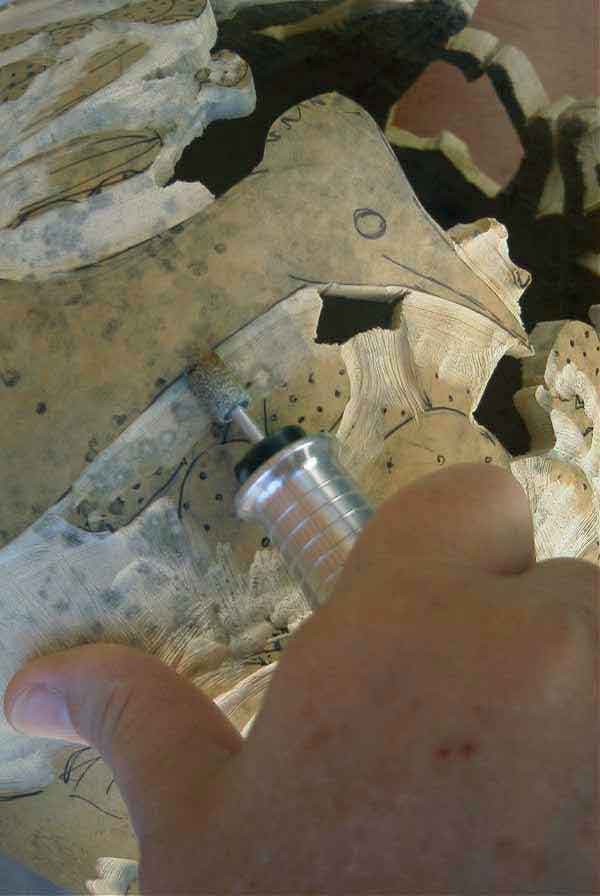
After the opening is cut, begin carving with a kutzall bur.  I carve the background first as shown in photo # 2, because it needs to be carved deeper.  

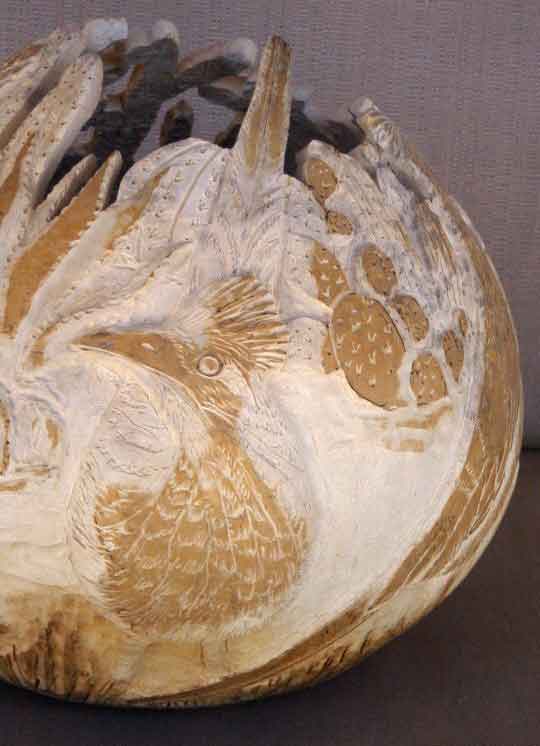
It is important for the main subject, the roadrunner, to be the most prominent part of the gourd.

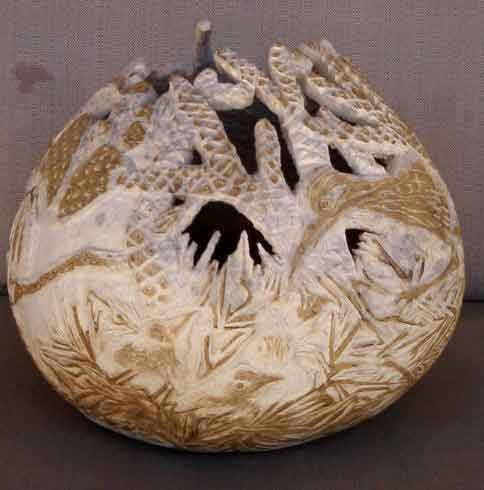
In photo #3, the background as well as part of the roadrunner are now carved.
The Process

Choosing the correct gourd is extremely important for carving gourds.  They must be as thick as possible.  I usually determine which gourds to choose by the weight (heavy) and sound (higher pitched thud) they make when I tap them with my knuckle.  This isn’t a foolproof method but it’s the best one I know.  
After cleaning the outside of the gourd, I draw on the design.  It must be carefully planned from a carver’s perspective. I keep in mind the areas that will be cut out. I also need an opening large enough at the top of the gourd to clean and finish the inside and still have this contribute to the finished design.  I draw the design on the gourd in pencil and then trace and refine the drawing with a permanent magic marker.  After I finish going over the pencil lines with marker, I wipe the gourd down with a wet paper towel to remove all the pencil marks.  Magic marker lines can be a problem on a gourd because they will bleed through paint.  To remove these remaining lines, when the carving is finished, I use lacquer thinner or sand paper.  Most of the time, this is not a problem for me.  I usually cut off most of the outer shell and all marker lines.
Teneriffe
Power Carving
Gourds
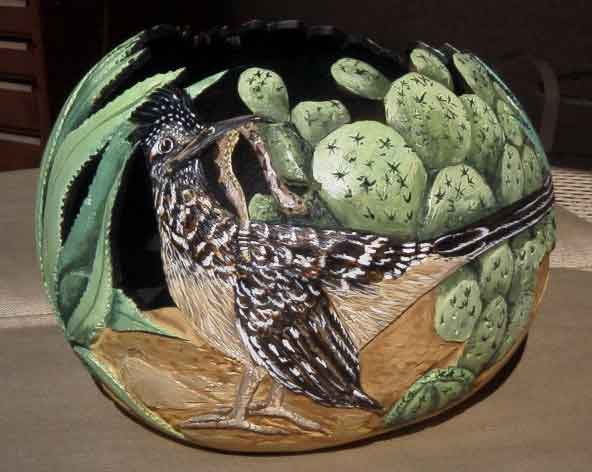
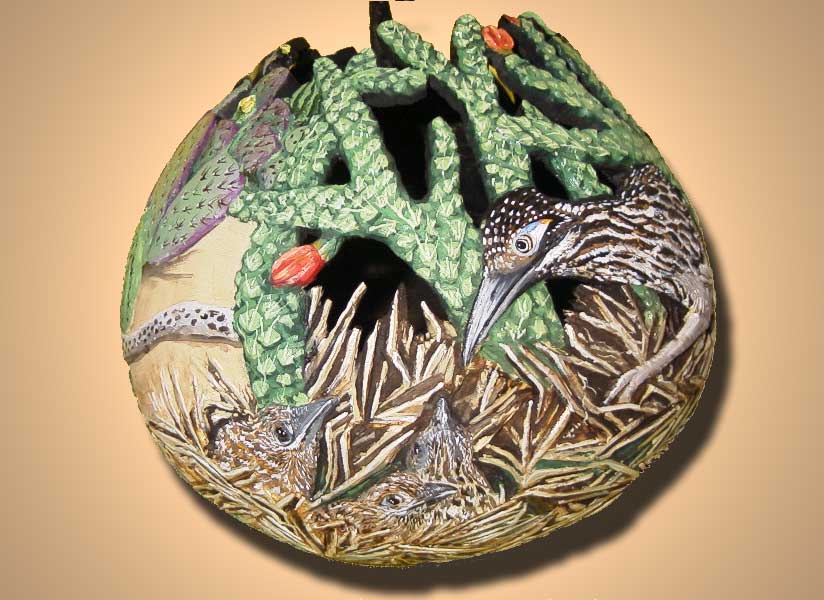
It's all in the perspective. From initial layout of the design to actually beginning the carving, the key element is thinking the idea through in depth, literally!  Learning to imagine the cut each tool makes, and when to use it, all comes with experience. This shows carving from the beginning to the end.
Gourd # 1
Gourd # 3
Gourd # 2
Gourd # 5
Gourd # 7
Gourd # 6
Gourd # 4
Caption Information

The gourd is completely carved in photo #4.  The final carving was done with the Turbo Carver.  Photo # 5 shows the finished painted gourd.
Caption Information

Photo #6 is carved and ready for painting.  Photo #7 shows the finished gourd.
Gourd # 9
Gourd # 8
Caption Information

Photo #8 is the back side of gourd photo #5 while photo #9 is the front of photo #7.
Home
Unless otherwise noted, all images and designs are the property of Phyllis Sickles and may not be used without permission.